
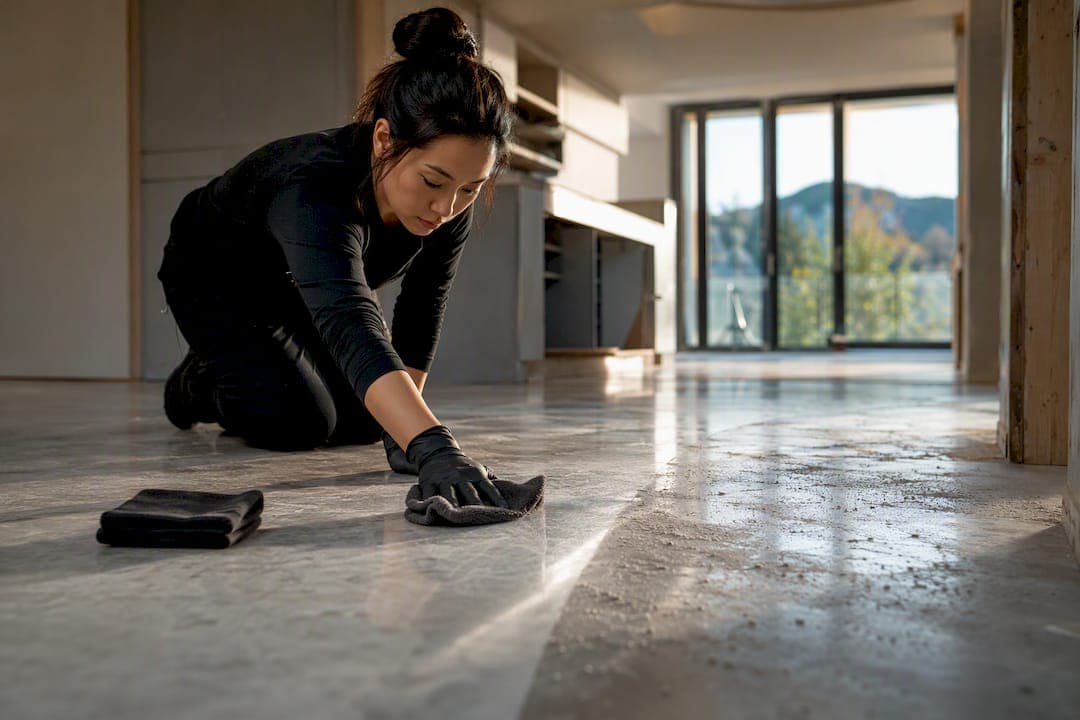
Use a three-phase cleaning sequence, rough, light, and final, paired with HEPA-grade air filtration and fresh HVAC filters. That combination is what separates a space that looks clean from one that's genuinely move-in ready. Success means no visible dust under raking light and no fine particles getting pulled back into circulation through the air system.
TL;DR:
- A three-phase cleaning process ensures no dust reaccumulates, with HEPA filtration and HVAC filter replacement crucial for capturing micro-fine renovation particles.
- Final inspection should include a raking-light check and HVAC system test, revealing residual dust invisible under normal lighting and verifying filter change effectiveness.
- Standard vacuums cannot effectively remove drywall silica and fine dust, making professional HEPA equipment essential for thorough post-construction cleanup.
- Replacing HVAC filters before system reactivation prevents recirculating settled dust, and high-efficiency filters (MERV 11 or higher) are recommended for better air quality.
- Hire professionals when dust persistently reappears, hazardous materials are suspected, or project scope exceeds residential single-room cleaning, requiring advanced equipment and testing.
Table of Contents
- What is a post construction cleaning checklist and how is it structured?
- Room-by-room post-renovation cleaning checklist
- Equipment and supplies for a proper construction cleanup guide
- Why HEPA filtration and HVAC filters matter for indoor air quality
- Final inspection: the raking-light and HVAC check
- When a post construction cleanup needs a professional
- How Veil Concierge manages a post-construction handover
- A managed alternative to tracking every cleaning phase yourself
- Sources
- FAQ
What is a post construction cleaning checklist and how is it structured?
A post construction cleaning checklist works because it respects the order trades leave a site in. Skip a phase, or clean out of sequence, and you end up redoing work once the next layer of dust settles.
Cleaning guides in the industry consistently break the process into three phases: rough, light, and final. Each one has its own timing and purpose.
- Rough clean happens immediately after major trades finish, before finishes go in. This phase removes bulk debris, packaging, offcuts, and loose construction waste. Safety comes first here: nails, screws, and sharp debris need clearing before anyone walks the space without boots.
- Light clean (sometimes called the detail clean) starts once fixtures and finishes are installed but before the final walk-through. This is where surface dusting, removing protective films from windows and appliances, and HEPA-vacuuming every horizontal surface happen, all before any wet cleaning touches the room.
- Final clean is the polish stage: sanitizing, streak-free glass, cabinet interiors wiped down, and a white-glove pass over every touchpoint a new occupant will notice first.
General contractors often handle rough debris removal since it overlaps with their own site cleanup obligations. Light and final cleans are usually better handled by a dedicated cleaning crew with HEPA-rated equipment, since standard vacuums simply cannot capture micro-fine renovation dust without recirculating it. Coordinating the handoff between trades and cleaners is where most delays happen. Book the final clean only after the last punch-list item closes, or you'll be paying for a second pass.
Room-by-room post-renovation cleaning checklist
Work from ceiling to floor and from the back of the room toward the exit. This order matters more than it sounds: dust dislodged from a ceiling fan or vent will settle on everything below it, so cleaning the floor first just means redoing it. Moving back-to-front also stops you from tracking dust into areas you've already finished.
General areas
- Dust light fixtures, ceiling fans, and crown moulding first.
- Wipe switch plates, outlet covers, and door frames.
- Clear window ledges and baseboards, where fine drywall dust collects thickest.
- Vacuum upholstery and any built-ins before wiping them down.
Kitchen
- Pull out or open all appliances and clean underneath and behind them.
- Empty and wipe every cabinet interior, corners included, since drywall dust settles into joints.
- Use a food-safe, pH-neutral sanitizer on countertops and interior cabinet surfaces before anything goes back in.
- Degrease range hoods and backsplash areas where construction residue mixes with airborne grease.
Bathrooms
- Sanitize all fixtures, taps, and toilet hardware.
- Remove grout haze and mineral film left behind by tile-setting or plumbing work.
- Clean mirrors and glass shower doors with a streak-free approach; construction dust leaves a stubborn haze that regular glass cleaner sometimes needs two passes to lift.
- Check under-sink cabinetry for debris trapped near plumbing access points.
Cabinets and closets
- Vacuum interior shelving with a HEPA attachment before wiping.
- Check hinges and tracks, where fine dust jams sliding mechanisms.
Windows, glass, and frames
- Clean tracks and frames first, then glass; skipping the tracks just redeposits grit on the pane.
- Remove any leftover manufacturer film or tape residue with a plastic scraper, never metal, to avoid scratching.
Floors
- Dry-clean first with a HEPA vacuum, always before any damp mopping. Wiping wet over dry construction dust just turns it into paste.
- Damp mop hard surfaces with a pH-neutral cleaner afterward.
- Carpet exposed to renovation dust typically needs professional extraction rather than a standard vacuum pass, since fibres trap silica and drywall particles that resist surface cleaning.
HVAC vents
- Vacuum every supply and return register.
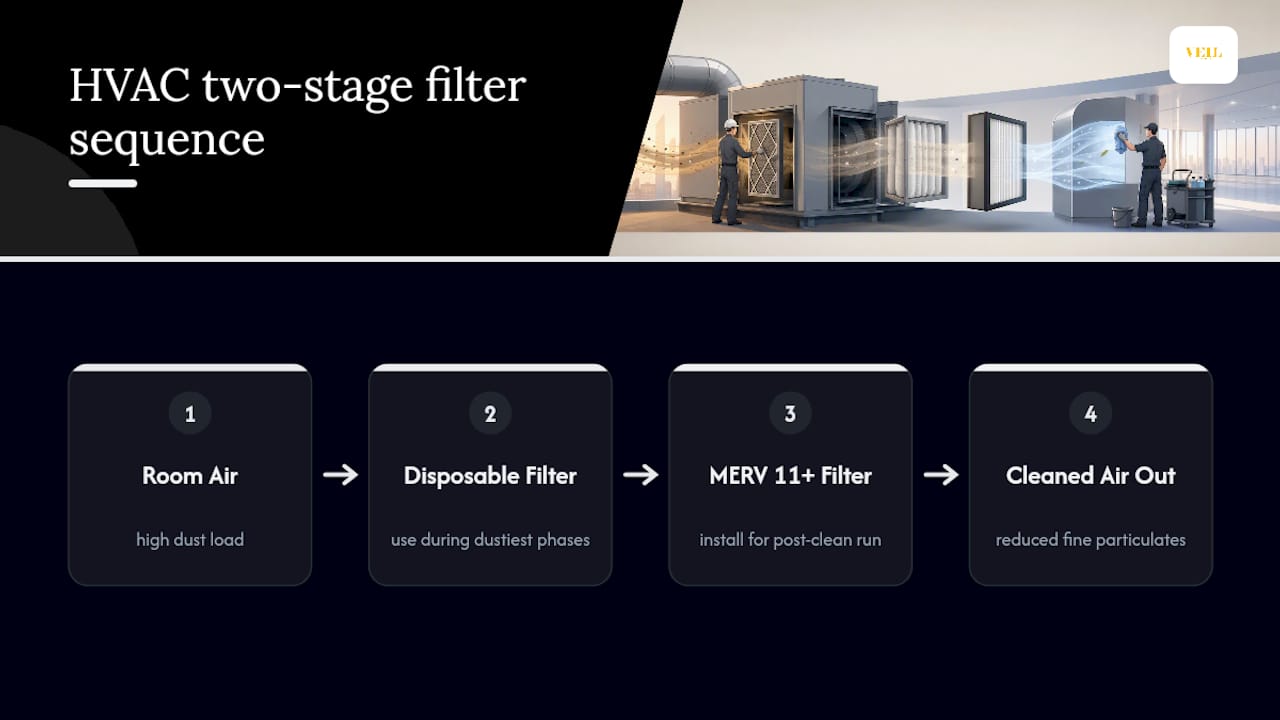
- Replace filters before the system runs again; a clogged or dust-loaded filter just recirculates what you spent hours removing.
Equipment and supplies for a proper construction cleanup guide
Consumables cover the basics: heavy-duty contractor bags, microfiber cloths (they trap dust rather than pushing it around), pH-neutral all-purpose cleaner, and plastic scrapers for adhesive and paint splatter.
The equipment tier matters more. A HEPA-rated vacuum is the single most important tool on this list, since standard household models can't filter fine construction particulates and end up blowing them right back into the air. An air scrubber or portable air purifier handles what settles after vacuuming. For larger jobs, a wet-vac or industrial extractor speeds up carpet and hard-floor recovery.
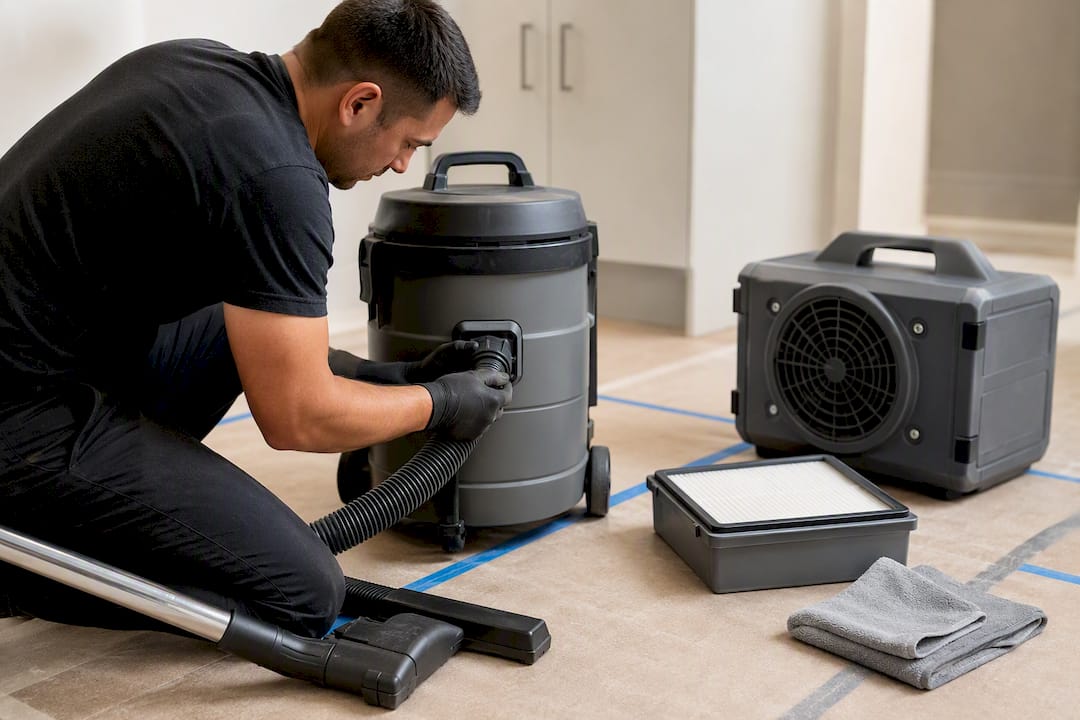
On the HVAC side, stock MERV 11+ filters for the system's post-clean run, plus cheap disposable filters to swap in during the dustiest phases so you're not burning through the good ones early.
PPE is not optional: N95 respirators (fit-tested if you can manage it), nitrile gloves, and eye protection for anyone handling debris or working near drywall dust.
Pro Tip: Renting HEPA equipment? Match the machine's airflow capacity to the room, not the whole job site. An undersized air scrubber in a large open-concept space will run constantly and still lose the battle against settling dust.
Why HEPA filtration and HVAC filters matter for indoor air quality
A room can look spotless and still be loaded with airborne particles too fine to see. That's the gap most DIY cleanups miss: surface-clean isn't the same as air-clean.
Renovation dust often contains silica and fine particulates that standard filtration misses entirely, which is why experts recommend running HEPA-grade air purification for 48 to 72 hours after cleaning to capture what settles after the visible mess is gone.
Replace HVAC filters before the system runs again, choosing a high-efficiency filter where possible, and choose MERV 11 or higher where the system allows it. Health Canada's guidance on indoor air quality points to ventilation and air cleaning as the two most reliable levers after any activity that raises airborne contaminants.
Watch for signs that go beyond routine dust: a chemical odour that lingers after ventilation, flaking paint in a pre-1990s home, or visible mould near plumbing work. Any of those calls for a professional test before cleaning continues, since some hazardous materials require licensed remediation rather than a deep clean.
Final inspection: the raking-light and HVAC check
Confirm the job is truly done before calling it finished.
- Kill the overhead lights and run a raking light (a flashlight held at a low angle) across every surface; this reveals fine residual dust invisible under normal lighting.
- Check that vents are dust-free and filters were replaced, then run the HVAC system briefly and watch for any dust blowout at the registers.
- Photograph any problem spots and get a documented sign-off from whoever performed the clean.
- If dust reappears after final trades touch up paint or trim, run a targeted light clean on just that area rather than redoing the whole space.
When a post construction cleanup needs a professional
Persistent dust that returns after cleaning, multi-room or commercial-scale projects, visible HVAC contamination, or any hazardous-material flag are the clearest signs it's time to call in a specialist rather than push through with a mop and a rented vacuum.
Professionals bring HEPA-rated equipment sized correctly for the space, duct cleaning, carpet extraction, and air-quality testing that a homeowner's toolkit can't match. When requesting quotes, ask for scope by phase (rough, light, final), turnaround time, and references from comparable jobs, commercial firms in particular should confirm experience with multi-trade coordination.
How Veil Concierge manages a post-construction handover
Coordinating trades, cleaners, and final inspections across a busy renovation is its own project, one most homeowners underestimate until the sign-off date arrives. Cleaning crews with HEPA-capable equipment are scheduled appropriately, trades are confirmed closed out before the final clean is booked, and the walk-through is managed to ensure nothing gets missed.
Clients who prefer a fully managed handover, rather than tracking three phases and multiple vendors themselves, typically turn to this kind of oversight for secondary residences or properties they can't personally inspect on a tight timeline. Reviewing a contractor's completion status before scheduling final cleaning is worth doing carefully, and contractor verification checklists offer a useful reference point for what to confirm before that last visit.
— Veil
A managed alternative to tracking every cleaning phase yourself
The vendor side of a post-construction handover is coordinated, including trades confirmation, phased cleaning with HEPA-capable crews, and a final documented walk-through, reducing the need for clients to chase schedules between contractors and cleaners. That's the practical difference for an absentee owner or a busy professional: one point of contact manages the sequence, not three separate phone calls a week.

This kind of oversight fits naturally alongside broader property oversight and event coordination services for owners managing renovations on a home they cannot personally supervise day to day. For larger handovers, possibly paired with an event or client visit after completion, consider reaching out via the appropriate property management page to plan phased cleaning and walk-throughs according to your timeline.
Sources
For deeper reading on indoor air quality after construction, see Health Canada's indoor air quality guidance and the 8-step renovation cleaning guide.
- Guidance: improving indoor air quality in office buildings — Health Canada
- Post-Construction Cleaning Checklist: Your Complete Guide — Business Cleaning Solutions
- Care
FAQ
What are the three phases of a post construction cleaning checklist?
Rough clean removes bulk debris right after major trades finish, light clean handles surface dusting and prep once finishes are installed, and final clean is the polish and sanitizing pass before move-in.
Is HEPA filtration really necessary after a renovation?
Yes. Standard vacuums can't capture the micro-fine dust construction work generates, and running HEPA filtration for 48 to 72 hours afterward captures what settles once the visible cleanup is finished.
When should HVAC filters be replaced during a cleanup?
Replace filters before running the system again once cleaning is done, since a dust-loaded filter will simply recirculate the particles you just removed back through the ductwork.
What is the raking-light check, and why does it matter?
Holding a light at a low angle across a surface reveals fine residual dust that's invisible under normal overhead lighting, making it a reliable final test before calling a space move-in ready.
When should I hire a professional cleaning crew instead of doing it myself?
Call in a professional when dust keeps reappearing after cleaning, the project spans multiple rooms or a commercial space, or you notice signs of hazardous materials like lead paint, asbestos, or a lingering chemical odour.