

Test your garage's relative humidity before buying anything, then install a garage-rated dehumidifier sized to the space and seal the largest air leaks. Aim for 50–55% relative humidity as the target range, and treat anything sustained above 65% as a mould risk. In the meantime, ventilate only when outside air is genuinely drier, and towel off wet vehicles before parking them for the night.
TL;DR:
- Measure your garage’s humidity with at least two hygrometers placed at different locations to identify whether moisture spikes are temporary or structural.
- Keep relative humidity within 50–55% to prevent mold, and treat sustained levels above 65% as a significant moisture problem requiring mechanical intervention.
- Fix common moisture sources such as poorly sealed doors, ground seepage, and wet vehicles to reduce baseline humidity and prevent frequent spikes.
- Select a dehumidifier sized to your garage’s area and moisture load, with features like auto-defrost and effective drainage solutions, especially in cold or unconditioned spaces.
- Use absolute humidity comparisons rather than fixed timers for ventilation to avoid introducing more moisture during high outdoor humidity conditions.
Table of Contents
- What to do in the first 24 to 72 hours
- How do you measure garage humidity properly?
- Why your garage gets humid in the first place
- Choosing a dehumidifier or mini-split for garage use
- Should you ventilate or run the dehumidifier?
- Sealing and insulation upgrades that cut the moisture load permanently
- Maintenance, drainage, and what it costs to run
- How garage humidity shifts through the seasons
- Should you install this yourself or hire a professional?
- Veil perspective: when to bring in professional oversight
- How Veil Concierge takes garage humidity off your plate
- Sources
What to do in the first 24 to 72 hours
Before you spend money on equipment, spend two days gathering real numbers. The quick wins below cost little and tell you exactly what problem you are solving.
- Place one or two hygrometers in the garage and log readings morning and night for 48 hours.
- Vent briefly after driving in wet if the outside air is drier than the garage. A box fan aimed at the open door speeds this along.
- Drop desiccant packs or containers into tool chests, storage totes, and anywhere you keep items sensitive to moisture.
- Set an existing dehumidifier to continuous drain or a timer rather than running it nonstop; if you don't own one yet, use this window to size the right unit for your space.
This short diagnostic period matters more than most homeowners expect. It separates a garage with a minor, seasonal moisture bump from one with a structural problem that needs sealing or a floor drain, and it keeps you from buying a dehumidifier that's either underpowered or overkill.
How do you measure garage humidity properly?
A single hygrometer near the door tells you almost nothing useful on its own. Garages have uneven airflow, so readings can swing 10 to 15 points between the entry and the far wall depending on where cold surfaces and vehicle heat interact.
Place your instruments deliberately:
- One hygrometer near the entry to the house, since this reading matters most for attached garages.
- One at the far corner of the garage, away from direct sun, heat vents, or the exhaust path of a running vehicle.
- Check both at the same time of day for at least two days before drawing conclusions.
A short spike after parking a snow-covered vehicle is normal and usually clears within hours. Chronic readings above 65%, especially overnight when temperatures drop and no vehicle has been driven, point to a real moisture problem rather than a passing event.
Target bands to work from: 50–55% relative humidity is optimal for protecting stored tools, electronics, and vehicles, while 35–65% is generally acceptable without active correction. Anything sustained above that upper line needs mechanical intervention, not just an open door.
Why your garage gets humid in the first place
Fixing the wrong cause wastes money on the wrong equipment. Most garage humidity problems trace back to a handful of repeat offenders:
- Wet vehicles and meltwater dump a large, irregular moisture load onto the floor every time you park after rain or snow.
- Poor grading or a missing floor drain lets ground moisture seep in and raises the baseline humidity even when no vehicle is present.
- Cold surfaces meeting warm, moist air creates condensation on windows, pipes, and metal doors, which is thermal bridging in action.
- Gaps around the service door, garage door seal, or wall penetrations let humid outside air migrate in, and in attached garages, that same air can move into living spaces.
Wet vehicles and thermal bridging tend to cause the sharp, short spikes you'll see on your hygrometer log, while grading and sealing problems drive the chronic baseline reading that never fully drops. Knowing which one you're dealing with tells you whether you need a bigger dehumidifier or a caulking gun first.
Choosing a dehumidifier or mini-split for garage use
A basement dehumidifier dropped into an unheated garage will freeze up and quit within weeks. Garage conditions, cold floors, dust, wide temperature swings, demand purpose-built equipment.
Sizing: match capacity to both floor area and moisture load, not just square footage. A two-car attached garage with frequent wet-vehicle traffic typically calls for a high-capacity unit appropriate for the moisture load.(https://www.farmersalmanac.com/relative-humidity-chart), while a lightly used single-car garage may need far less. Adjust upward if you live somewhere with long, wet winters or park a vehicle that's regularly soaked.

Low-temperature performance: look for units built with auto-defrost and rugged, industrial-style housings rather than standard indoor models, since coil freeze is the most common failure mode in an unconditioned garage. Several garage-specific ventilation and dehumidifier systems sold in Canada are rated for spaces up to roughly 750 square feet and advertise bucketless, continuously monitored operation.
Drainage: a garage without a floor drain needs either gravity drainage to an exterior grade point or a built-in condensate pump. Bucket-style units work for small garages checked daily, but they fail unattended, and a pump lets you route water uphill to a drain that gravity alone can't reach.
When a mini-split makes sense: if you want year-round temperature control in addition to dehumidification, say for a workshop or gym conversion, a ductless mini-split with a dedicated dehumidification mode is worth the added cost. Plan for a dedicated electrical circuit, outdoor unit clearance, and refrigerant line routing before committing.
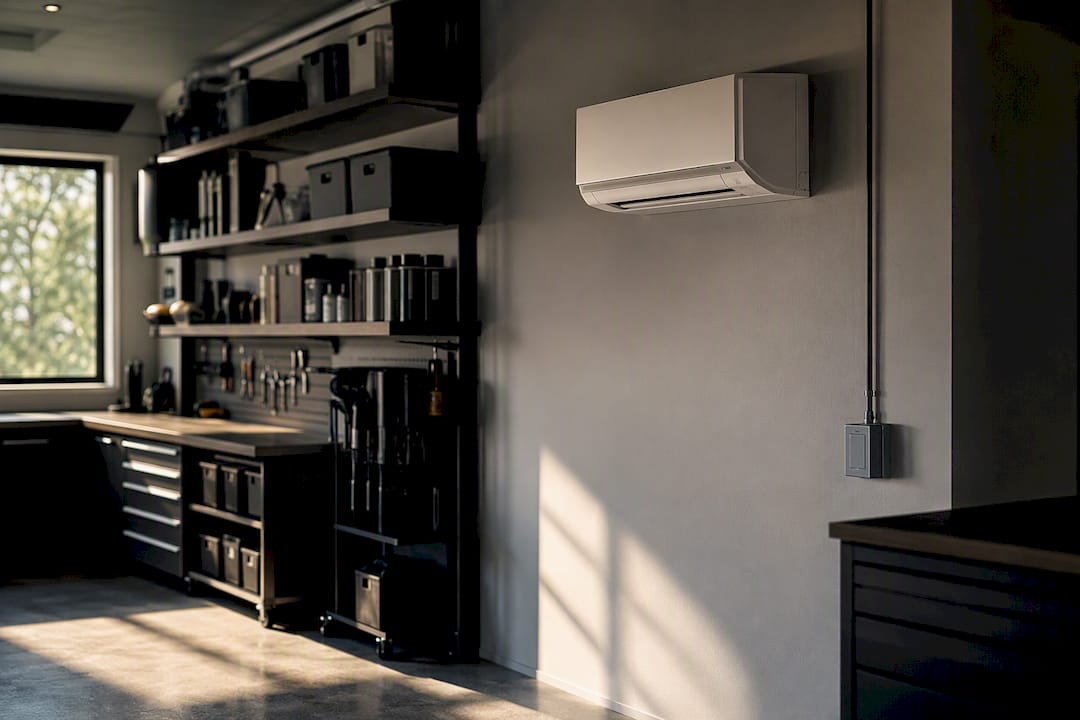
Placement: install centrally for even airflow, keep intake and exhaust vents clear of shelving and stored boxes, and confirm your electrical panel can support a dedicated circuit if the unit calls for one.
Pro Tip: Run a new dehumidifier for a full week before deciding it's undersized. Garages take longer to stabilize than basements because concrete floors hold moisture and release it slowly, so an early "it's not working" reading is often just the slab catching up.
Should you ventilate or run the dehumidifier?
Relative humidity tells you how saturated the air is at its current temperature, but it doesn't tell you whether opening the garage door will actually help. Absolute humidity, the real amount of water vapour in the air, is what decides that.
Outside air at 40°F and 80% relative humidity can hold far less water than garage air at 60°F and 55% relative humidity. Ventilate in that scenario and you're pumping in more moisture, not less.
- Ventilate only when the outside absolute humidity is measurably lower than inside; otherwise, let the dehumidifier do the work.
- A basic setup uses a humidity sensor to trigger an exhaust fan on a simple threshold.
- A smarter approach compares outdoor and indoor absolute humidity before activating any vent, which prevents the fan from working against you.
- Canadian building-controls guidance increasingly favours this absolute-humidity logic over fixed timers, especially through humid summer stretches.
If you're integrating sensors, a ventilation fan, and a dehumidifier into one automated system, bring in a controls professional. A poorly configured setup can end up ventilating at the worst possible moments, undoing whatever the dehumidifier just accomplished.
Sealing and insulation upgrades that cut the moisture load permanently
Mechanical equipment treats the symptom. Air sealing and insulation reduce how much moisture gets in to begin with, which means your dehumidifier runs less and lasts longer.
- Insulate the garage door, walls, and ceiling with sealed foam board or batt insulation matched to the assembly.
- Add weatherstripping and a proper threshold seal, then check that the service door and any windows close without visible gaps.
- Confirm exterior grading slopes away from the foundation and that floor drains, if present, actually direct meltwater outside rather than pooling it against the slab.
If grading or foundation water intrusion looks like the root cause rather than the door seals, bring in a contractor. Regrading and drainage work sit outside what most homeowners can safely diagnose from the surface, and getting it wrong just moves the water problem somewhere else on the property.
Maintenance, drainage, and what it costs to run
A dehumidifier left unmaintained loses capacity fast, especially in a dusty garage where the intake grille clogs within a season.
- Drainage: connect a continuous-drain hose to a floor drain where gravity allows it; use a built-in or add-on pump where the drain sits uphill or doesn't exist. Bucket-style units are the cheapest option but need daily emptying and fail the moment you're away.
- Filters and coils: rinse or replace the intake filter monthly during heavy-use seasons, and inspect the coil for frost buildup if you're running the unit through a cold winter.
- Running costs: expect higher draw during spring thaw and after wet-vehicle days, and lower draw once sealing improvements take hold. A programmable timer paired with a realistic 50–55% setpoint, rather than chasing a lower number, meaningfully cuts runtime without sacrificing protection for stored items.
How garage humidity shifts through the seasons
Garage moisture isn't a steady problem; it moves with the calendar, and the fix that works in July can be the wrong move in January.
Spring is usually the hardest stretch. Meltwater tracked in on tires and boots, combined with rapid outdoor temperature swings, creates the sharp condensation spikes you'll see on cold metal surfaces and windows. This is when a dehumidifier without auto-defrost is most likely to freeze up and stop working right when you need it most.
Summer brings a different challenge: high outdoor absolute humidity means ventilation often does nothing, or actively hurts. This is exactly when absolute-humidity logic pays off, since a simple open-the-door instinct can push more moisture in than it removes.
Fall is typically the calmest season for garage humidity, with moderate temperatures and lower moisture loads, making it a good window to run maintenance checks before winter arrives.
Winter shifts the problem toward condensation from thermal bridging rather than raw moisture volume. Cold garage surfaces meeting the residual warmth and humidity from a recently parked vehicle create localized wet spots even when the overall relative humidity reading looks fine. This is also the season where low-temperature-rated equipment earns its keep, since standard indoor dehumidifiers stall out below a certain temperature threshold.
Reviewing your hygrometer log every season, rather than setting a single year-round target, catches these shifts before they become chronic damage.
Should you install this yourself or hire a professional?
Placing a portable dehumidifier and running a drain hose to a nearby floor drain is well within reach for most homeowners, and it's often the right starting point. The equipment plugs into a standard outlet, the drain hose is a hardware-store part, and the learning curve is mostly patience.
Professional installation earns its cost once the project involves a dedicated electrical circuit, a condensate pump routed through finished walls, or a ductless mini-split with refrigerant lines and an outdoor condenser. Miswiring a dedicated circuit or improperly mounting an outdoor unit creates real safety and warranty risk, and most manufacturers void coverage on mini-splits installed without a licensed technician.
Structural fixes, regrading, foundation sealing, or correcting a missing floor drain, almost always call for a contractor. These aren't projects where a mistake is easily undone, and getting the water table and grading wrong can push moisture toward the house rather than away from it.
The middle ground, and where most homeowners underestimate the value of help, is ongoing oversight: someone checking that the dehumidifier is actually draining, the filter isn't clogged, and the readings haven't crept upward while you were away. That's less a technical installation question and more a scheduling and accountability one.
Veil perspective: when to bring in professional oversight
Recurring mould, repeated condensation on the same surfaces, or valuable stored vehicles and equipment change the calculation. At that point, occasional homeowner checks aren't frequent enough to catch a failing drain or a dying compressor before damage sets in.
Veil coordinates the parts homeowners tend to miss: scheduled inspections with documented moisture logs, trades for HVAC and electrical work, and regular monitoring between visits. For clients away from a property for extended stretches, that oversight is often the difference between catching a problem early and finding it after the damage is done.
— Veil
How Veil Concierge takes garage humidity off your plate
Reading a hygrometer log and comparing dehumidifier specs is manageable for a weekend project. It's a different story when you're managing a second residence from another city, or simply don't want moisture control added to an already full plate. Veilconcierge coordinates the whole process: scheduling an initial inspection, sourcing and installing the right garage-rated equipment, arranging trades for sealing or drainage work, and running ongoing checks so a small leak never becomes a mould claim.

This isn't a one-time fix and walk away. Veil builds moisture checks into the same visit schedule used for the rest of your property oversight, so drainage, filters, and readings get reviewed alongside everything else on the property. If you're ready to hand off the monitoring and let someone else worry about the humidity swings, reach out through Veil Concierge's home management page to arrange an initial property assessment.